
Are you struggling to connect your printed materials to your digital content? Manual URL entry creates unnecessary friction that causes potential customers to drop off before they reach your site. This guide walks you through selecting the right code type, customizing your design, and downloading a scannable asset ready for any use case.
Select the Right QR Code Type
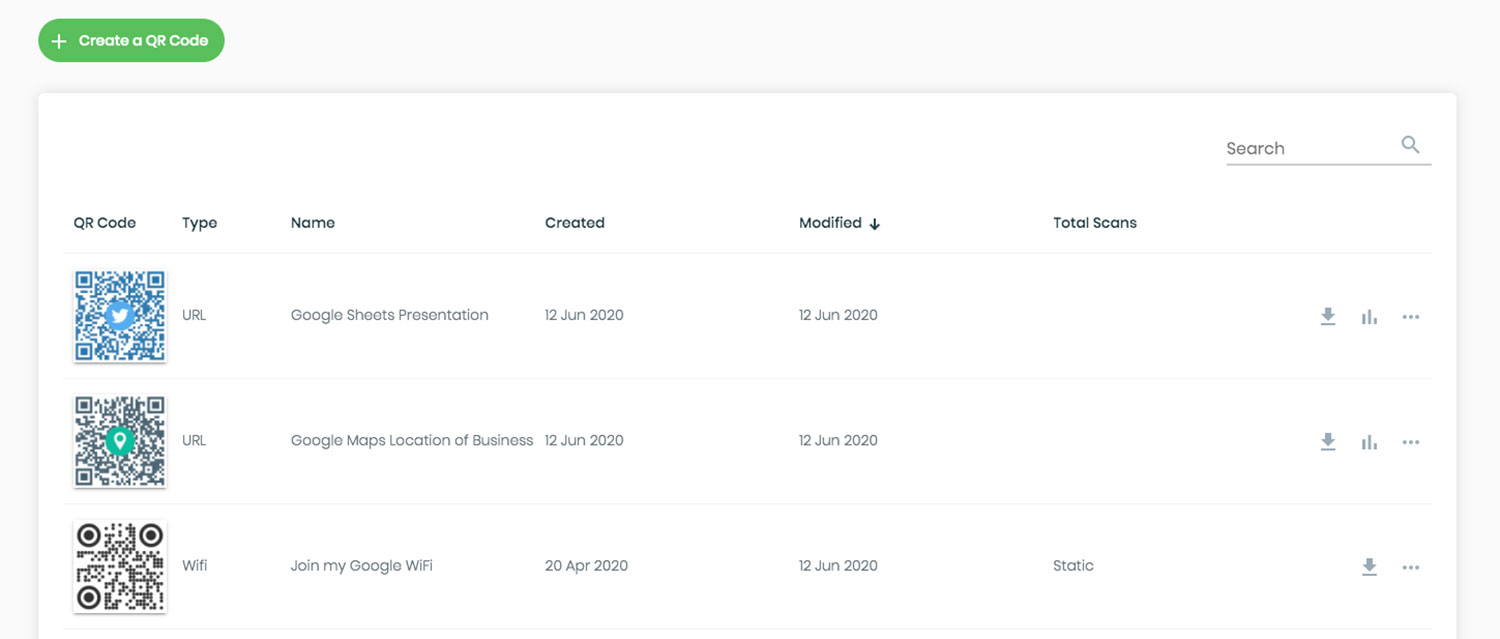
Before generating anything, decide which format fits your goals. QR codes fall into two categories: static and dynamic. A static code encodes information directly into the pattern at the time of creation. Once printed, that data cannot be changed, which makes static codes well suited to fixed information like Wi-Fi credentials or personal contact details.
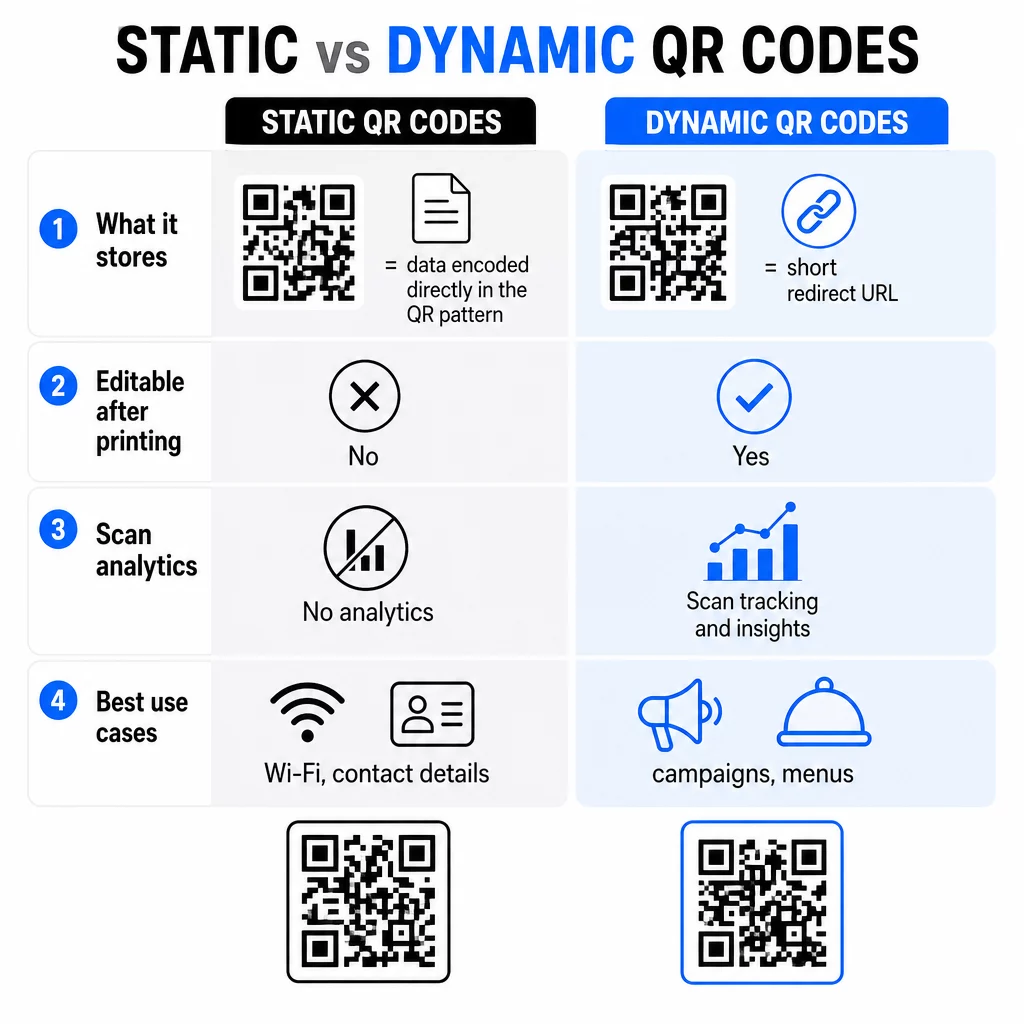
Dynamic codes work differently. The pattern points to a short redirect URL, and you control where that redirect sends the scanner. Because the destination lives on a server rather than in the pattern itself, you can update it at any time without reprinting. For a deeper comparison of when each format applies, see the guide on static vs. dynamic QR codes.
Dynamic codes also unlock real-time analytics. You can see how many times a code was scanned, on which devices, and from which locations – data that lets you refine campaigns rather than guess at performance. If you need to swap a seasonal menu or update a promotional link mid-campaign, dynamic codes make that change instant.
Step-by-Step Generation and Customization
Once you know which type you need, the creation process requires no technical background. The QR code generator is designed so that anyone can produce a professional, high-quality asset in a few steps.
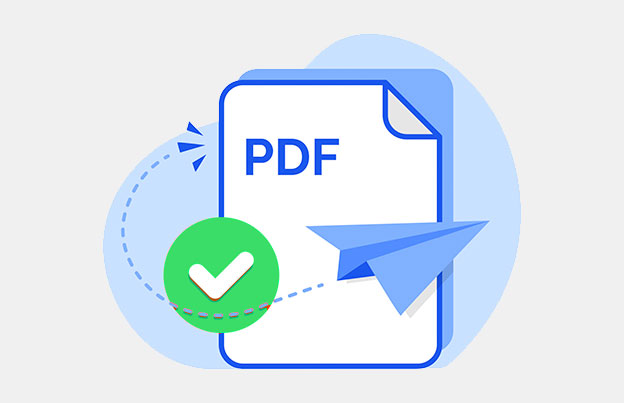
- Choose your content type: Select the category that matches what you want to share. You can turn a URL into a scannable link with the link QR code generator, share documents through the PDF QR code generator, or deliver contact details instantly with the vCard QR code generator. Supported file formats include PDF, DOC, DOCX, PPT, CSV, and ZIP.
- Enter your destination data: Type in your URL, upload your file, or input the text or contact information you want to encode. The generator handles the rest.
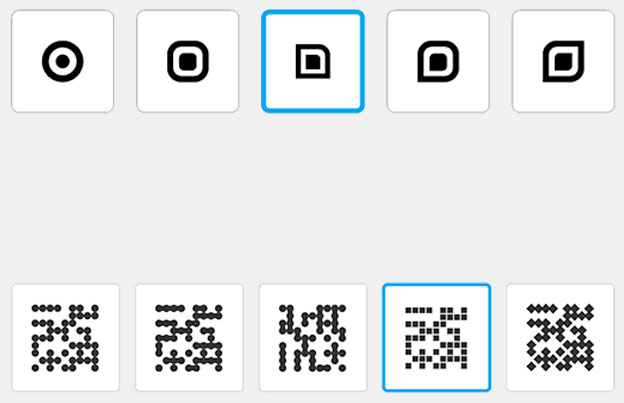
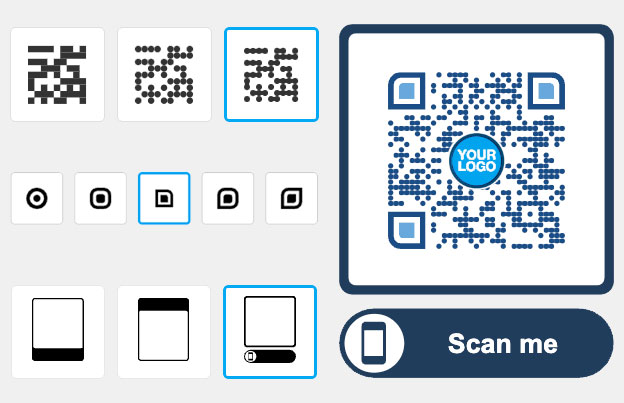
- Apply branding: Move beyond the default black-and-white pattern by adding your logo, choosing brand colors, and selecting a design template. Custom-styled codes reinforce brand recognition at every touchpoint. For a full walkthrough of design options, see the guide on how to create a custom QR code.
- Download and test: Save the file in a resolution appropriate for your output. Always scan the finished code on multiple devices before sending materials to print.
Update Your Code Without Reprinting Using a dynamic code means your printed materials never become obsolete. Use the QR code generator to create an editable code and update the destination anytime from your dashboard.
Design and Print Best Practices
A well-generated code can still fail if the design or print specifications are off. Scanners rely on contrast to distinguish the dark modules from the light background, so always use a dark foreground on a light background. Reversing that relationship – light modules on a dark background – dramatically reduces scan reliability. For more detail on how color choices affect performance, the QR code color contrast guide covers the technical standards worth following.
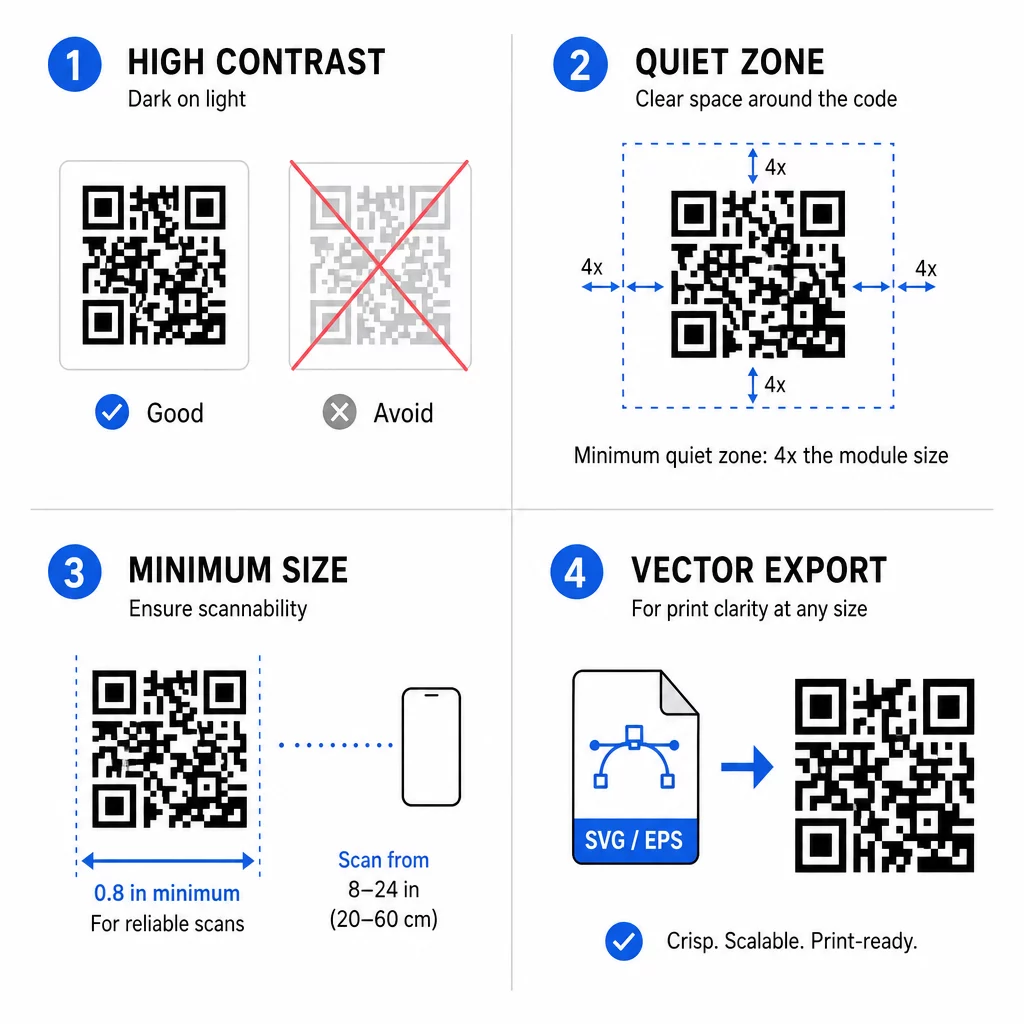
Size is equally important. A practical rule is the 10:1 distance-to-size ratio: if someone will scan from 20 inches away, the code needs to be at least 2 inches wide. For business cards and other close-range materials, a minimum of 0.8 × 0.8 inches is the standard floor. Going smaller risks scan failure on phones that struggle to focus on a dense pattern.
For print production, download your assets in a vector format such as SVG or EPS. Vector files scale to any dimension without pixelation, which matters when the same code appears on both a flyer and a banner. A full breakdown of print and usability standards is available in the checklist for designing user-friendly QR codes.
Additional practices worth building into your workflow:
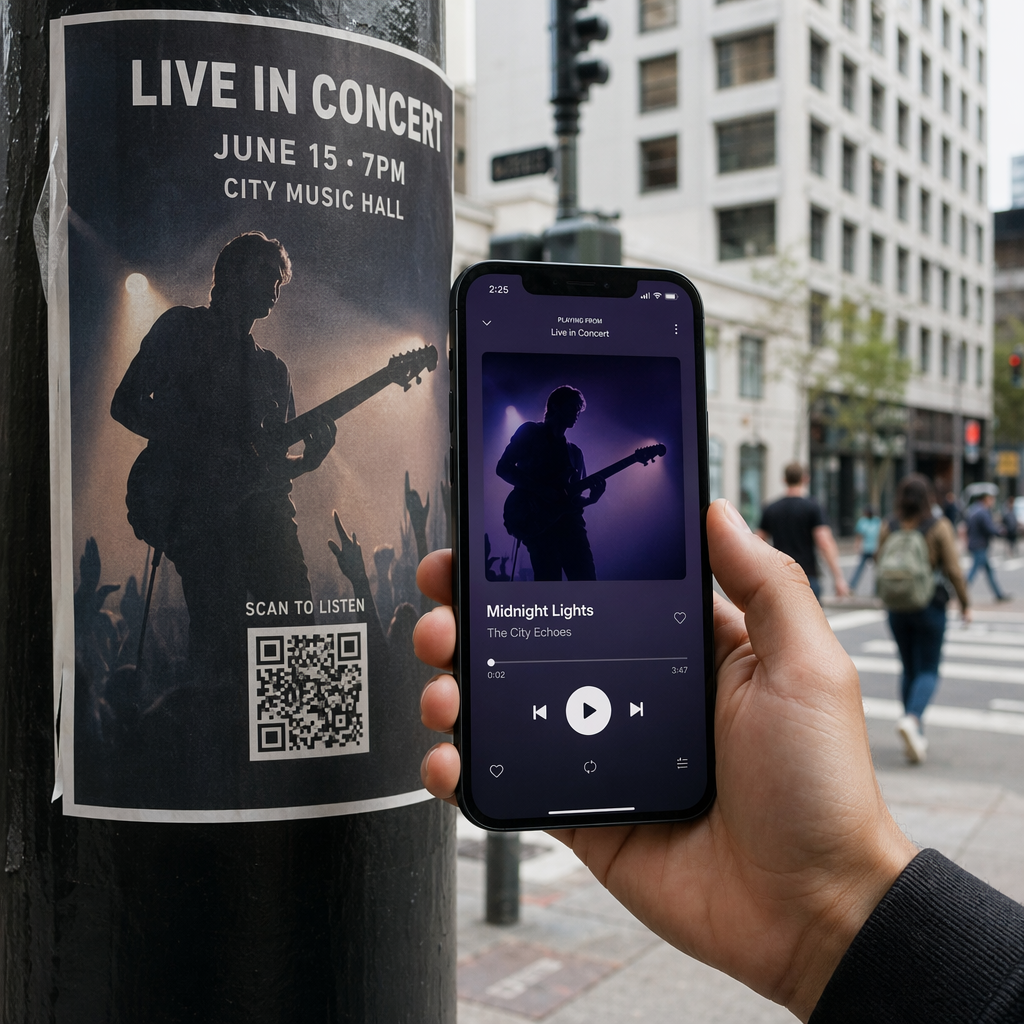
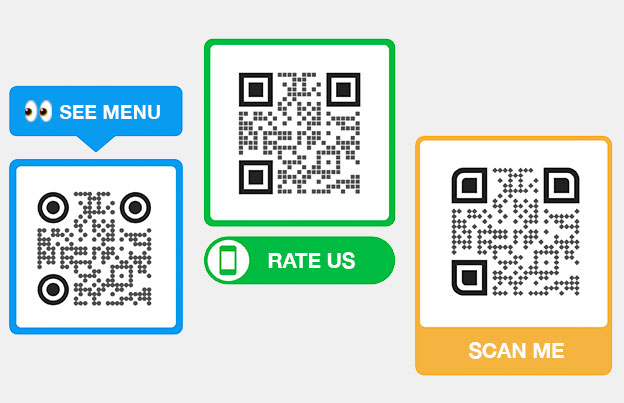
- Add a brief call-to-action near the code (e.g., “Scan for the menu”) so users know what to expect
- Leave a quiet zone – a clear margin – around the entire code to prevent surrounding design elements from interfering with scanning
- Test in varied lighting conditions, especially for codes placed in dimly lit environments
- Review QR code usability best practices before finalizing any high-volume print run
Monitor Your Campaign in Real-Time Want to see exactly where and when your customers are scanning your materials? Use the QR code generator to create trackable codes and access a full performance dashboard today.
Choosing the right code type, applying consistent branding, and following print specifications are the three levers that determine whether a QR code actually performs in the field. Start with a clear goal, generate a dynamic code if you need flexibility, and test thoroughly before committing to print.
Frequently Asked Questions
You can only update the destination if you used a dynamic QR code. Static codes have the destination encoded directly into the pattern, so changing where it points requires generating and printing a brand-new code. Learn more about how to edit QR codes after creation.
A minimum of 0.8 × 0.8 inches is recommended for close-range materials like business cards. Below that threshold, many smartphones struggle to focus on the pattern and decode it reliably.
No. Most modern smartphones can scan QR codes directly through the built-in camera app. Users point the camera at the code and receive a notification with the destination link – no third-party app required.


