Are you looking for a way to generate vector-based QR codes without leaving your design software? Manually drawing modules is tedious and leads to errors that prevent successful scans. This guide shows you how to use Inkscape’s built-in tools to create functional, scalable QR codes.
Locating the QR Code Tool in Inkscape
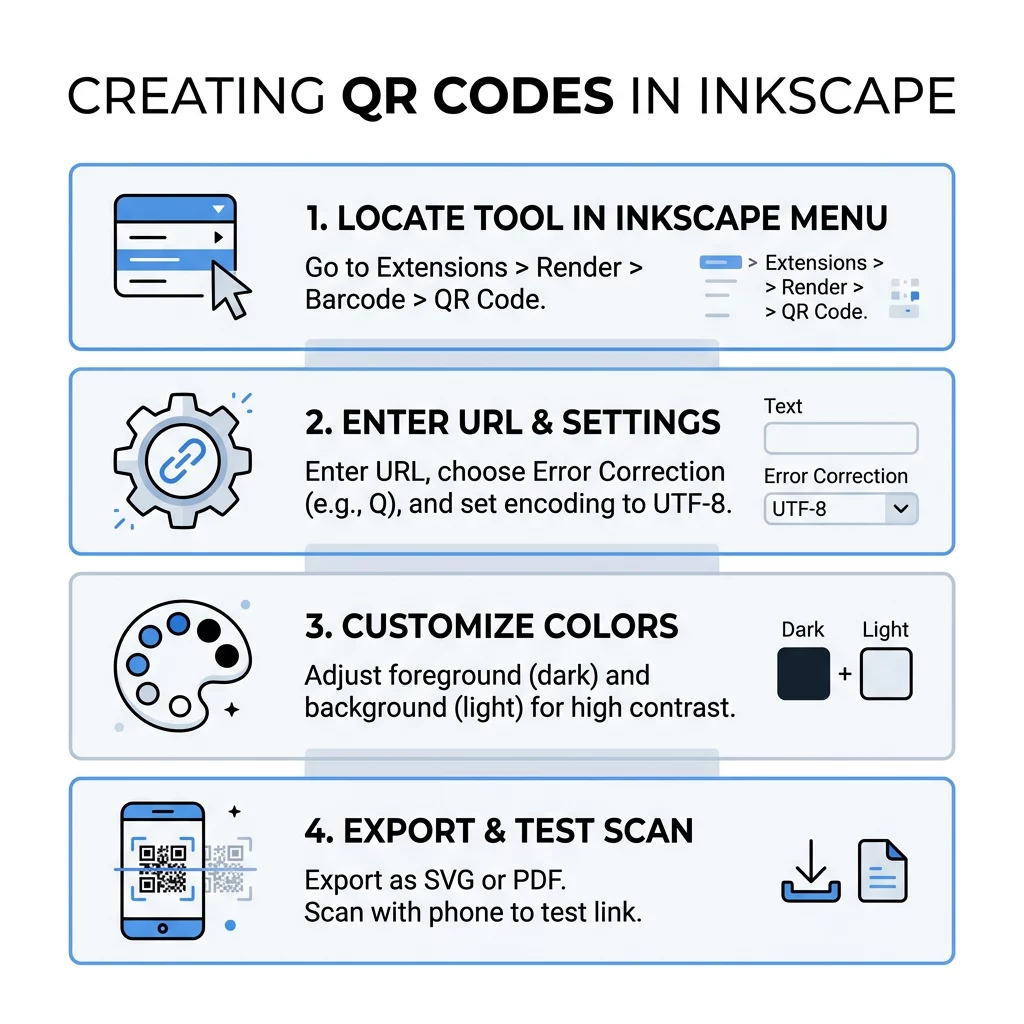
Inkscape provides a native extension that renders QR codes as editable vector paths, which is essential for maintaining crisp lines in high-resolution print materials. Depending on your version of the software, the tool may be in a slightly different location. For Inkscape versions 1.0 and 1.1, you can typically find it by navigating to Extensions > Render > Barcode > QR Code.
If you have updated to version 1.2 or later, the tool is often simplified under Extensions > Render > QR code generator. If these options do not appear in your menu, ensure your software is updated to the latest version to access the most stable rendering features. Unlike raster images, these vector-based codes allow you to scale your design for anything from a small business card to a massive billboard without losing clarity or scannability.
Configuring Your Generation Settings
Once you open the generator dialog box, you must configure several technical settings to ensure the resulting code is functional. The most critical field is the Text or Data field, where you enter your destination. If you are creating a link QR code, it is best practice to include the full “https://” prefix to ensure all scanner apps recognize the URL correctly.
The Error Correction Level is another vital setting that determines how much of the code can be damaged or covered while remaining readable. You can choose between levels L, M, Q, and H. Selecting Level H (30%) provides the highest durability, which is necessary if you intend to overlay a brand logo in the center of the code later. For general purposes, Level M (15%) offers a good balance between data density and reliability. Finally, ensure the Encoding is set to UTF-8 for the broadest compatibility across different international devices and character sets.
If you need advanced features like automatic Wi-Fi connectivity or trackable analytics that Inkscape cannot provide natively, use the Pageloot QR code generator to create professional-grade codes that can be imported directly into your vector workspace.
Customizing Design and Branding
Because Inkscape renders the QR code as a group of vector paths, you have the freedom to modify the design to match your brand identity. To begin editing, select the generated code and use the command Object > Ungroup (Ctrl+Shift+G). This allows you to select individual modules or the background separately. You can then use the Fill and Stroke panel to change the black modules to your brand colors.
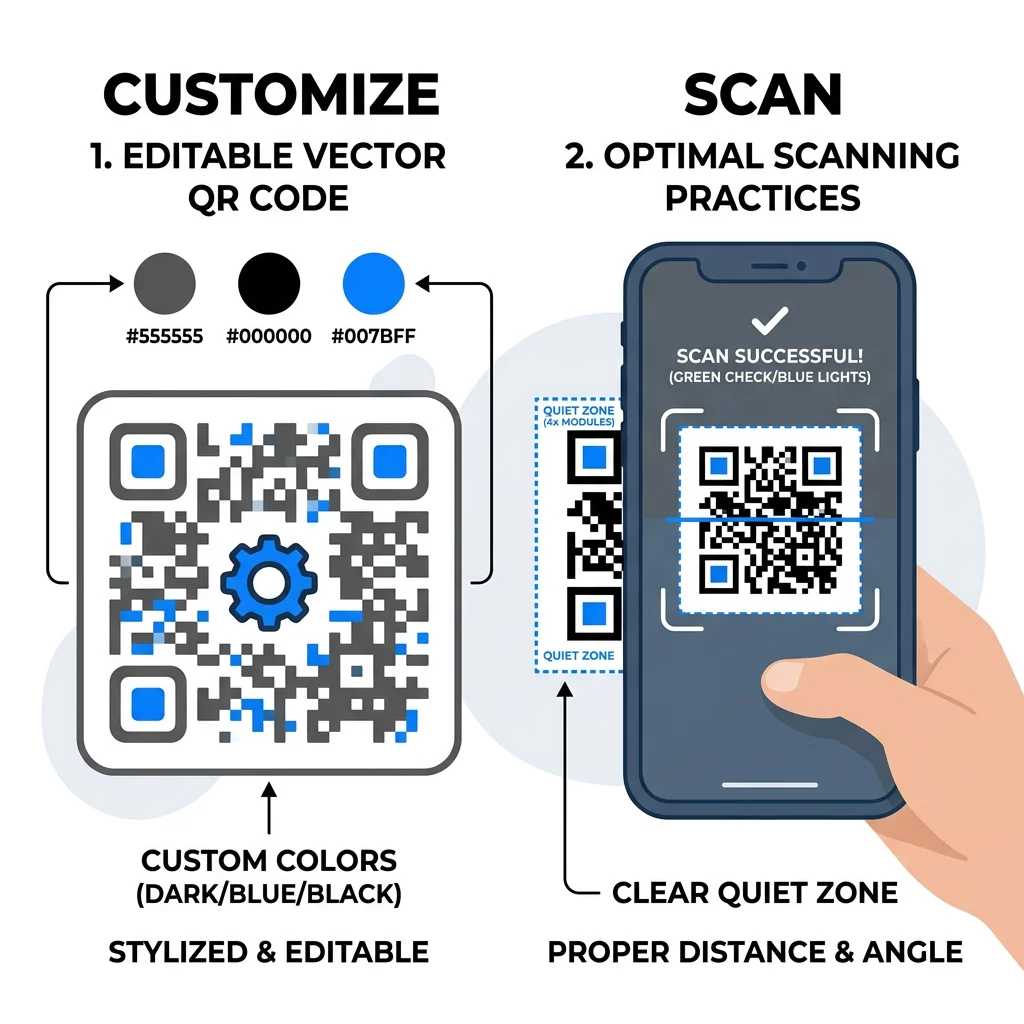
When applying custom styles, you must maintain QR code color contrast best practices to ensure the code remains functional. Darker colors absorb more light, while lighter colors reflect it; scanners rely on this distinction to read the data. Always use a dark foreground on a light background, aiming for a contrast ratio of at least 4.5:1. If you wish to add a logo, place it in the center and ensure it occupies no more than 20% of the total area to avoid overlapping critical data modules. For more creative styling options, consult our guide on how to create a custom QR code.
Best Practices for Scannability
Technical standards are the difference between a successful campaign and a broken link. Every QR code requires a “quiet zone,” which is a clear margin of empty space around the four sides of the code. This border should be at least four modules wide to help smartphone cameras isolate the code from surrounding text or graphics.
- Maintain a minimum print size of 2 x 2 cm (0.8 x 0.8 inches) for close-range scanning.
- Keep the data simple by using shortened URLs to prevent the pattern from becoming too dense.
- Always hold the Ctrl key when resizing to maintain a perfect square aspect ratio.
- Export your final design as an SVG or PDF to preserve vector quality for professional printing.
Data density directly impacts how easy a code is to scan. When you understand QR code data limits, you can keep your patterns clean and fast-loading. For more detailed technical requirements, refer to the best practices for QR code readability.
Static vs. Dynamic Workflow
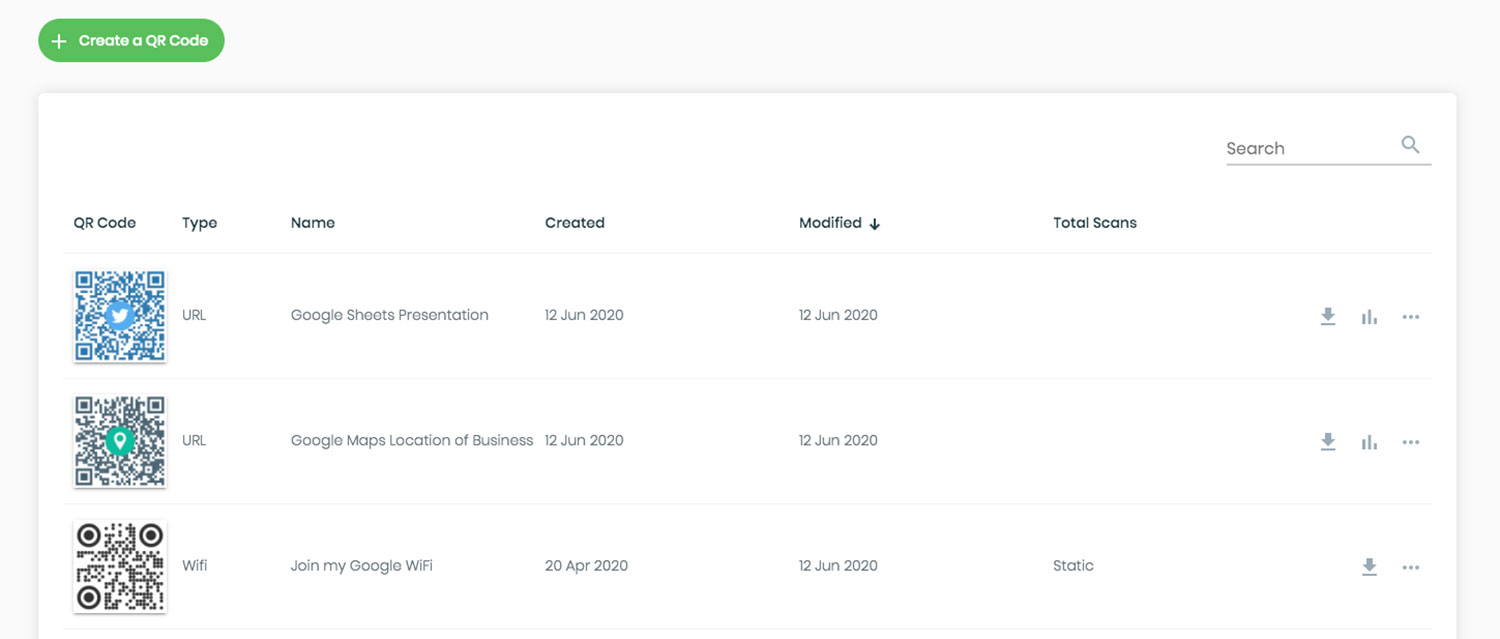
It is important to remember that the codes generated inside Inkscape are static. This means the data is hard-coded into the pattern and cannot be changed once printed. If you discover a typo in your URL or need to change the destination later, you will have to regenerate the code and reprint all your materials.
In contrast, static vs dynamic QR codes offer different levels of flexibility. Dynamic codes use a short redirect URL, allowing you to update the destination link at any time without changing the physical QR code. This is especially useful for marketing campaigns where you may want to track scan analytics or update a seasonal promotion.
FAQ
The most likely issue is a lack of contrast. If your chosen color is too light or the background is too dark, the scanner cannot distinguish between the modules and the spaces. Always perform a grayscale test or use a contrast checker to ensure the modules stand out clearly.
Inkscape’s built-in generator is designed for basic text and URLs. To create a WiFi QR code that automatically handles network names and passwords, it is more efficient to use a dedicated tool and then import the resulting vector file into your Inkscape project.
You can use path operations or the Shape Builder tool to modify the corners of the modules, but this must be done with extreme caution. Drastic changes to the shapes can confuse the scanner. Always test the code with multiple devices after making any aesthetic changes to the module geometry. Effective QR code design in Inkscape combines creative freedom with technical precision. By following these steps, you can ensure your designs remain both beautiful and perfectly functional for your audience. To gain access to advanced tracking and editable content for your next design project, sign up for a free trial with Pageloot today.


