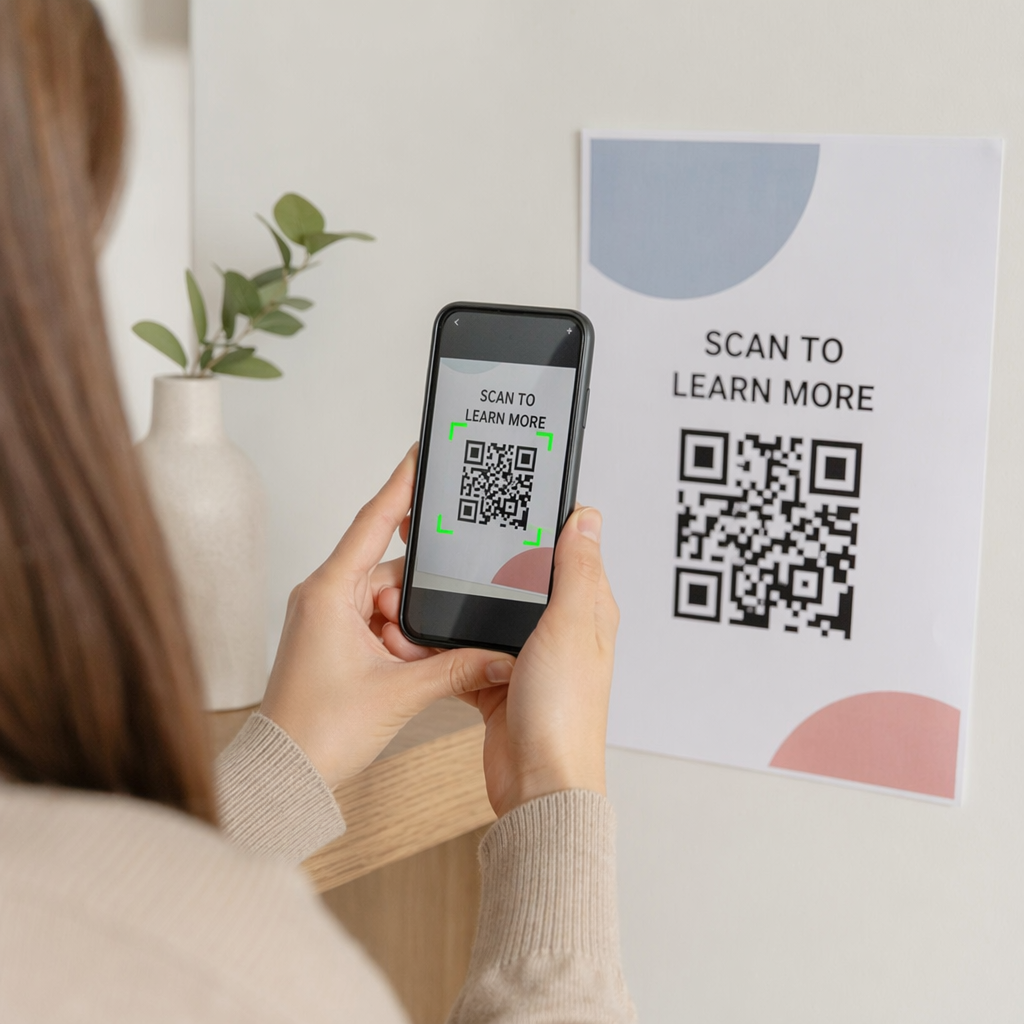
Will your customers actually be able to scan your QR code once it is printed? A code that is too small or blurry creates a technical barrier for users, leading to missed conversions and brand frustration. This guide provides the essential requirements for dimensions, scan distances, and resolution to ensure your print materials perform reliably every time.
Why Scanning Distance Dictates QR Code Size
The relationship between the viewer and the printed material is the most important factor in determining how large a QR code needs to be. For a smartphone camera to successfully resolve the individual modules of a code, the code must occupy a sufficient portion of the camera’s field of view. As a user moves further away, the code appears smaller to the sensor, eventually becoming a blurry square that the software cannot decode.
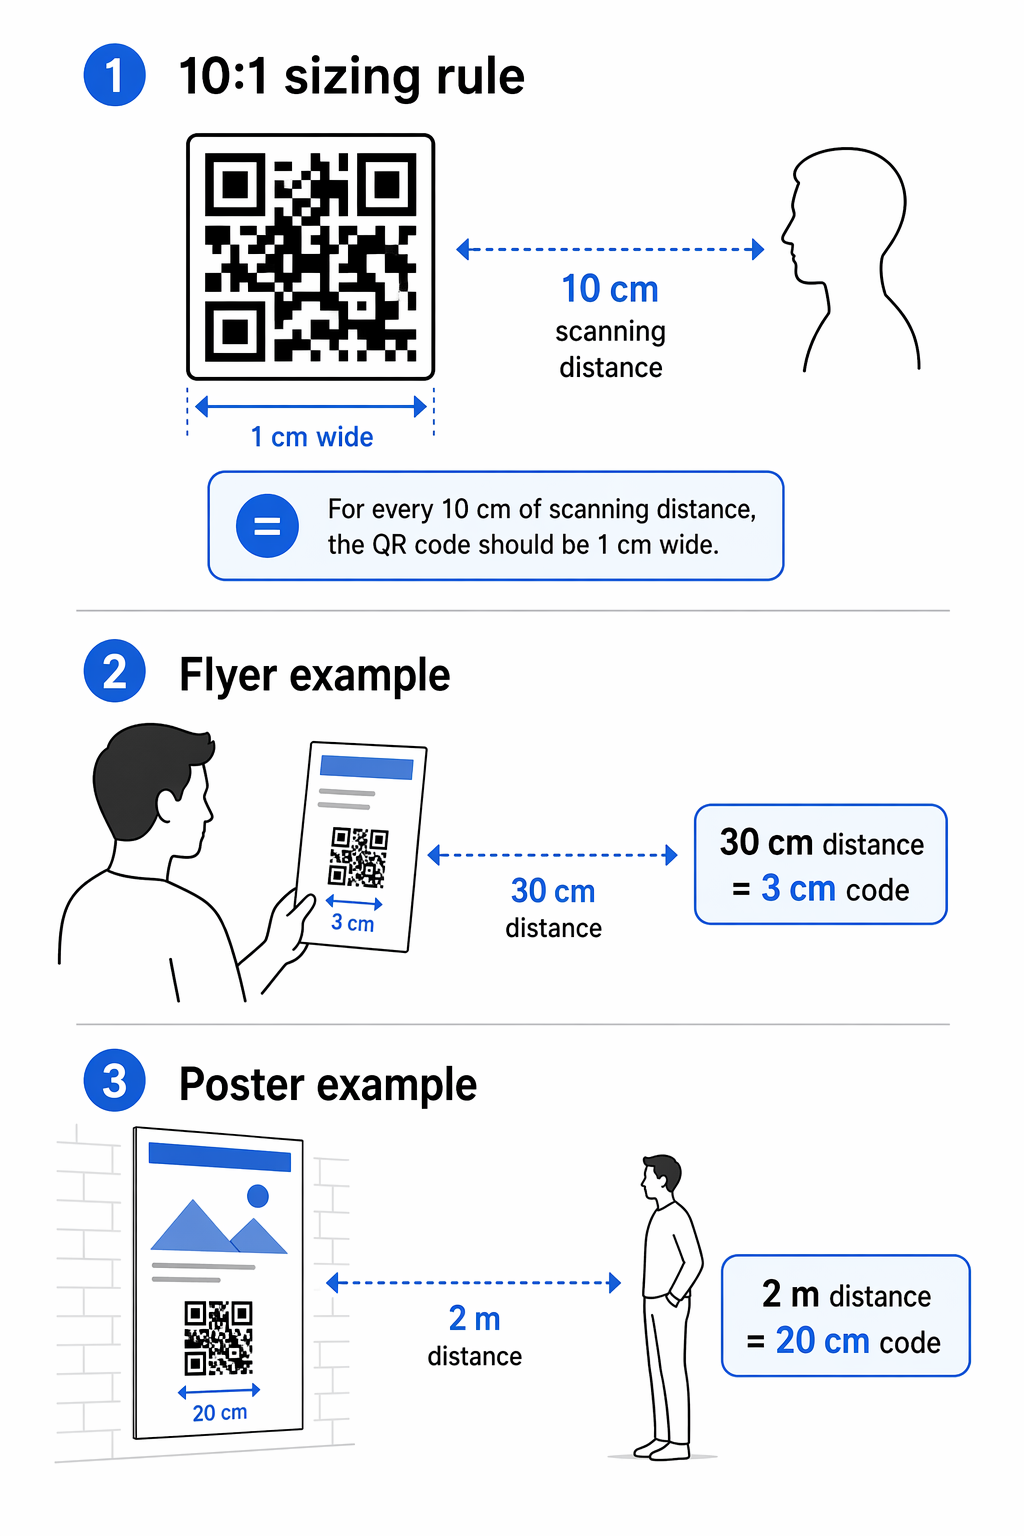
To prevent this, you should follow the 10:1 sizing rule for distance. This guideline suggests that the QR code should be at least 1 cm wide for every 10 cm of distance between the user and the code. For example, a flyer held at arm’s length (about 30 cm) requires a code at least 3 cm wide. This rule scales effectively to large-format advertising; if you expect people to scan a banner from 50 feet away, the QR code should be approximately 5 feet wide to maintain visibility.
Recommended Minimum Dimensions for Print
While the 10:1 rule helps with distant scans, there are absolute physical minimums you must respect for close-range interactions. Most modern smartphones can reliably scan a code that is 2 x 2 cm (0.8 x 0.8 inches). This size is considered the safe standard for items like business card QR codes where space is limited but scanning is done from a very short distance.
For marketing materials where the data density is higher – such as those containing a vCard or a long URL – a minimum print size of 3 x 3 cm is recommended. Using a size smaller than 10 mm is generally discouraged, as even high-end cameras struggle to focus on modules at that scale, especially in varied lighting conditions. If you are struggling with a code that looks too dense at small sizes, you can use a QR code generator to create a dynamic code, which uses a shorter URL to keep the pattern simple and easy to read.
Print Resolution and File Formats
Even a perfectly sized QR code will fail if the print quality is poor. Scanners require sharp, crisp edges to distinguish between the black modules and white spaces. To achieve this, your files should be printed at a resolution of at least 300 DPI. Low-resolution images often appear “anti-aliased” or blurry when printed, which confuses the scanning software and prevents it from identifying the data grid.
The format of your file also impacts the final output. Raster files like PNG or JPG are acceptable for small labels, but they can lose quality when scaled up for posters. For most professional needs, you should use vector formats such as SVG, EPS, or PDF. These formats allow you to resize the code infinitely without losing sharpness. You can use a QR code print quality checker to verify that your design meets the technical standards required for reliable scanning.
The Importance of Quiet Zones and Contrast
The “quiet zone” is the empty margin surrounding the QR code that separates it from other design elements, text, or graphics. International standards require this zone to be at least four modules wide on all sides. Without this buffer, the scanning software may fail to recognize where the code starts and the surrounding artwork ends. Think of it as a protective border that ensures the scanner can focus solely on the data modules.
Contrast is equally vital for scannability. Scanners rely on the difference in light reflectance between the dark modules and the light background. While custom colors can improve brand alignment, the most reliable choice remains a dark foreground on a light background. You should always follow QR code color contrast best practices by aiming for a contrast ratio of at least 4.5:1. Avoid inverted colors (light code on a dark background), as many older scanning applications are programmed only to recognize dark patterns on light surfaces.
Surface and Material Considerations
The material you choose for your print can significantly change how a QR code behaves. Glossy paper or glass surfaces often create glare, which acts like a white “blind spot” for the camera sensor. If you must print on reflective materials, increasing the size of the code can sometimes help the scanner find enough readable data points to compensate for the reflection. Matte finishes are generally the most reliable choice for high-speed scanning.
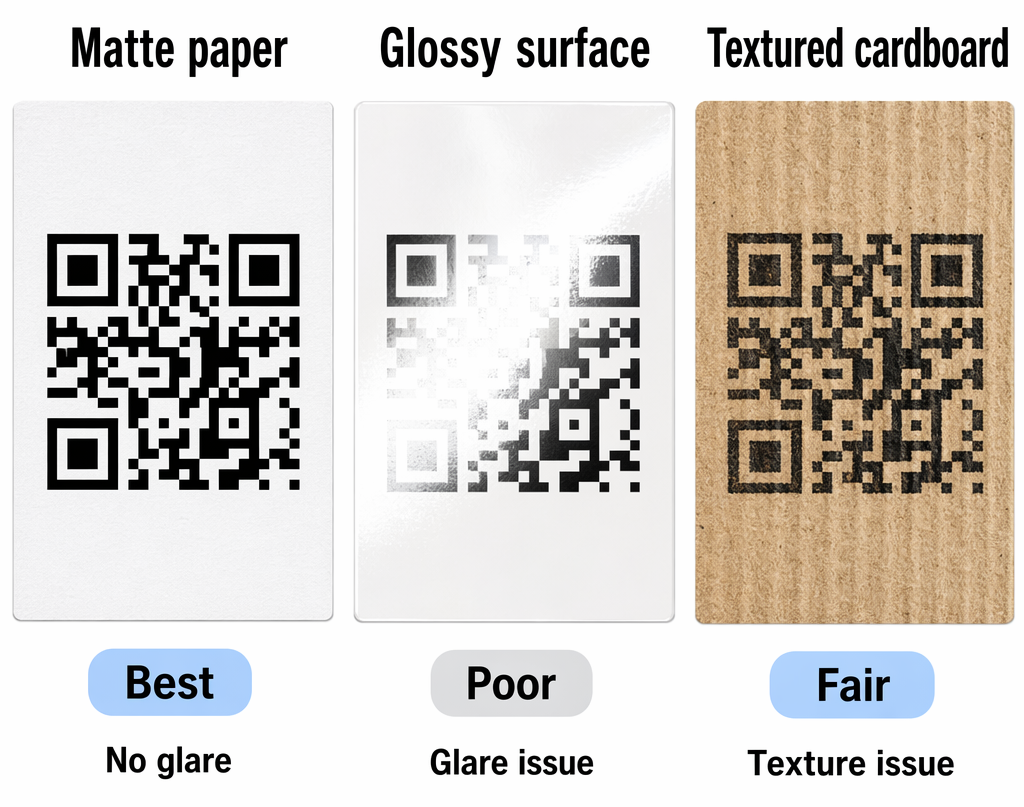
Textured materials like cardboard or fabric present different challenges. Corrugated cardboard has ridges that can physically distort the modules, while fabric weaves can “break” the clean lines of the code. When you print a QR code on a label intended for textured surfaces, it is best to increase the size by 25% to 50% to ensure the modules remain distinct. Understanding how printing techniques impact scannability allows you to adjust your design early in the process to avoid costly reprinting.
Ensure Your Print Strategy Works Don’t let a sizing error break your marketing campaign. Use our QR Code Generator to create high-resolution, vector-ready codes that are optimized for any print surface.
Adapting Sizes for Different Materials
Different materials require specific adjustments to maintain functionality. While paper is the most forgiving, cardboard and fabric require more conservative sizing to account for ink bleed or surface irregularities.
- Paper: Ideal for standard sizes (2 cm to 4 cm) and offers the best contrast for marketing materials.
- Cardboard: Requires a slightly larger minimum size (at least 15 mm) to overcome the texture of the material and potential ink absorption.
- Fabric: The most challenging surface, requiring codes at least 20 mm wide and simple patterns to prevent the weave from distorting the modules.
- Glass and Metal: These surfaces are highly reflective; you should place the code in a flat area and consider a matte vinyl overlay to reduce glare.
Matching your QR code sizing for different print materials ensures that your digital bridge remains functional regardless of the medium. Always perform a test print on the actual material and view it under different lighting conditions before proceeding with a full production run.
Frequently Asked Questions
For reliable scanning at arm’s length, 2 x 2 cm (0.8 x 0.8 inches) is the standard minimum. In extreme cases for business cards, you can go down to 10 mm, but only if the data is very simple and the print quality is high.
You should calculate the size of your QR code by dividing the expected scanning distance by ten. If your poster will be scanned from 2 meters (200 cm) away, the QR code should be at least 20 cm wide.
This usually happens when using raster formats like PNG or JPG. For large-format printing, always export your QR code in a vector format like SVG or EPS, which maintains perfect sharpness at any size.


