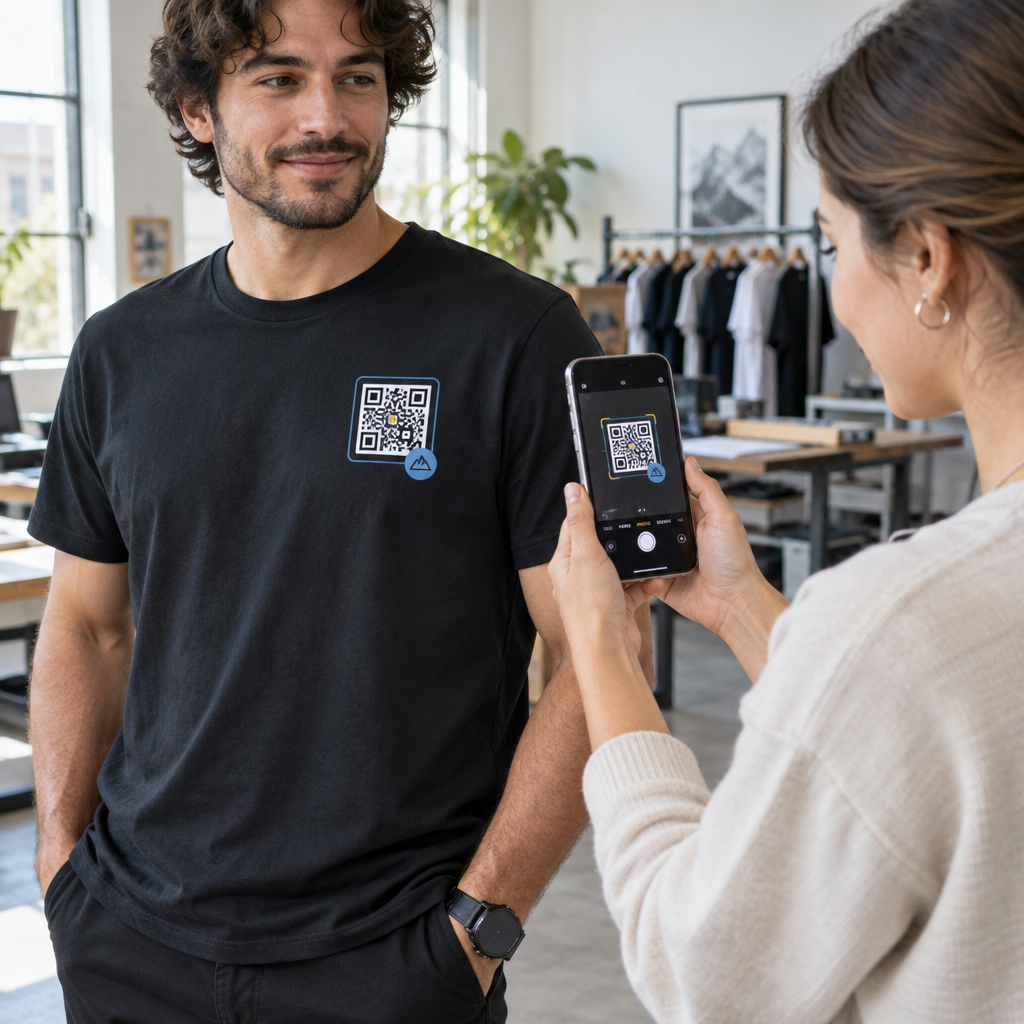
Does your DTF-printed QR code fail to scan once your customer puts on the T-shirt? A blurry or distorted code frustrates wearers and wastes production costs on defective apparel. Here is how to format, print, and heat-press scannable QR codes that survive everyday wear and laundering.
Size and Quiet Zone Requirements for Fabric
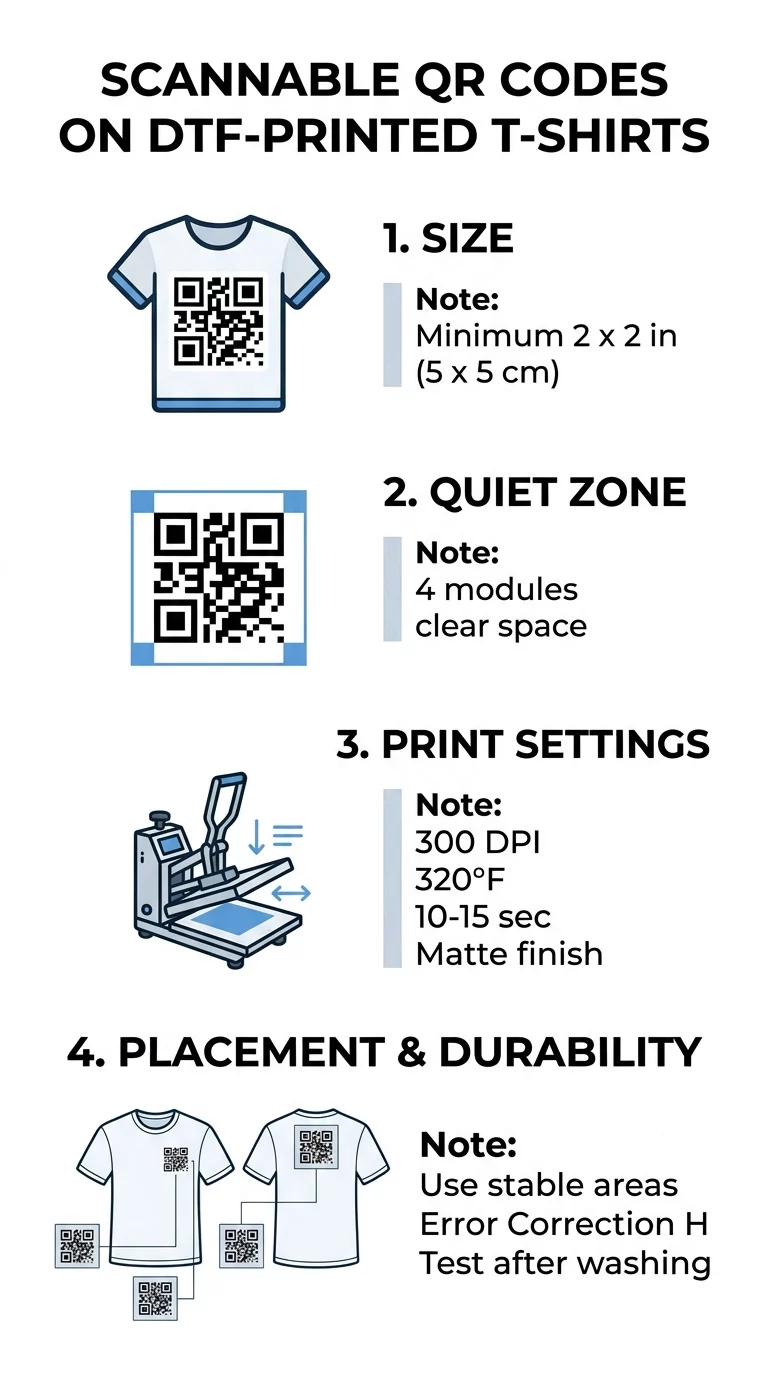
Fabric moves, stretches, and folds when worn, which makes textile scanning far more demanding than reading a code on rigid paper. While a tiny code might work on a desktop business card, a QR code on clothing should measure at least 2×2 inches (5×5 cm). Anything smaller compresses the individual modules – the tiny black and white squares carrying the encoded data – causing smartphone cameras to fail when fabric bunches or curves across the body. When planning for longer scanning distances, apply the 10:1 scanning ratio outlined in our מדריך גודל קוד QR, which requires 1 inch of code width for every 10 inches of distance between the phone and the shirt.
Along with overall dimensions, you must preserve the quiet zone. This is the blank margin framing all four sides of the code that tells the camera where the code begins and ends. Per ISO/IEC standards, this clear area must be at least four modules wide. If each module is 2 mm wide, provide an 8 mm unprinted or uniform border around the graphic. Cropping into this margin or running artwork right against the finder patterns prevents mobile cameras from isolating the data grid.
Setting Contrast and Error Correction
Optical scanners decode information by analyzing light reflection between light and dark sections. Dark modules absorb light while pale backgrounds reflect it back to the sensor. To ensure rapid detection across different phone cameras, maintain a contrast ratio of at least 4.5:1. Black on a solid white background remains the industry benchmark. If you incorporate brand colors, check our שיטות עבודה מומלצות לניגודיות צבעי קוד QR to confirm your foreground is significantly darker than the background, and avoid mid-tones, gradients, or drop shadows.
Because garments experience stretching, wrinkling, and heavy abrasion in the wash, selecting the proper error correction level is crucial. QR codes offer four error correction settings:
- Level L restores up to 7% of damaged or obscured data.
- Level M restores approximately 15% of data and serves as the standard baseline for general print.
- Level Q recovers up to 25% of corrupted modules.
- Level H recovers up to 30% of damaged data, providing maximum redundancy for flexible textiles.
Selecting Level H allows the shirt to remain scannable even if parts of the print fade, crack, or crease during movement. While higher redundancy produces a denser module grid, using a short dynamic redirect URL keeps the modules large enough to print cleanly.
Create Your Print-Ready Garment QR Code Need a high-resolution code that allows link updates after production? Use the Pageloot מחולל קודי QR to design vector files with custom error correction today.
Preparing Artwork Files for Direct to Film Transfers
Direct to Film (DTF) transfers deliver crisp detail across cotton, polyester, and blended textiles, but digital artwork must be configured properly to avoid blurred lines. Understanding כיצד טכניקות הדפסה משפיעות על סריקות קוד QR helps you avoid common transfer pitfalls like ink spread and pixelation.
Follow these file preparation standards before sending artwork to the film printer:
- Export the code as a vector SVG or EPS file so module edges stay perfectly sharp at any scale.
- Use transparent PNG files saved at a minimum of 300 DPI at the exact final print size if raster artwork is required.
- Keep the original square aspect ratio when you resize a QR code to avoid distorting square modules into unscannable rectangles.
- Remove semi-transparent pixels, soft glows, and feathering around the edges to prevent white adhesive powder halos.
- Submit design files in RGB unless your DTF transfer provider specifically requests CMYK color formatting.
Pressing and Peeling Guidelines for DTF Transfers
Applying DTF transfers requires balanced heat, pressure, and timing so the adhesive powder bonds securely into the textile weave without flattening or smearing the printed modules. While exact settings depend on your film and garment composition, standard commercial parameters provide a dependable baseline:
- Pre-press the garment for 5 to 10 seconds to eliminate residual moisture and flatten fabric fibers.
- Press the transfer at 290°F to 325°F for 10 to 15 seconds using medium pressure.
- Follow the film manufacturer’s peel instructions precisely, letting cold-peel films chill completely or peeling hot-peel films immediately.
- Repress the design for 5 to 12 seconds under a protective sheet of parchment paper or Teflon to seal the transfer into the weave.
- Choose a matte protective sheet for the second press to eliminate glossy surface glare that reflects camera flashes.
Advise customers to wait 24 to 48 hours after application before washing the shirt. Garments should be washed inside out in cold water on a gentle cycle and line-dried or tumble-dried on low heat to keep module edges crisp.
Strategic Placement to Prevent Distortion
Placement dictates how flat the code remains while the garment is in use. Fabric shifts over muscle contours and bends around joints, creating optical distortions that slow down camera recognition. Reviewing practical guidelines for קודי QR על בגדים can help you choose the best zones for your apparel style.
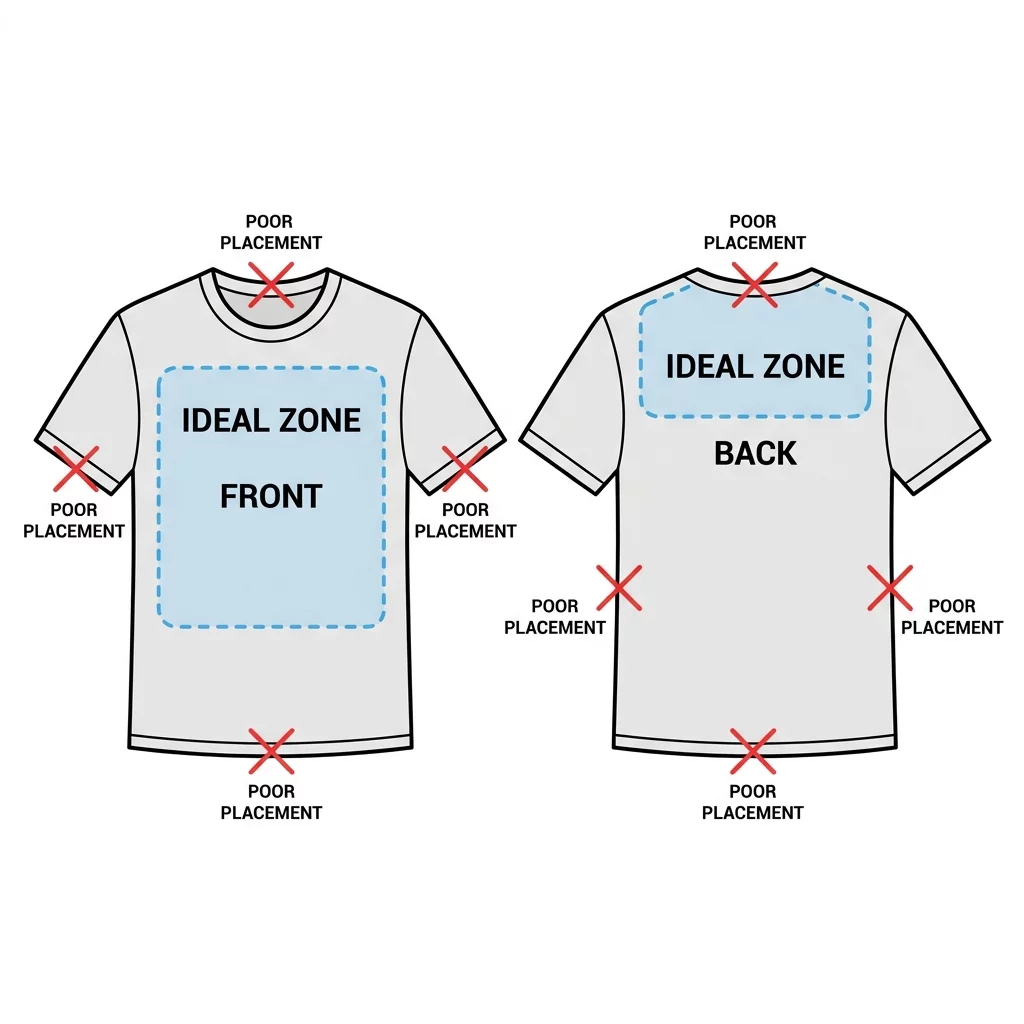
Select print locations that experience minimal mechanical stretch:
- Center the code across the upper chest or across the shoulder blades on the upper back where the fabric stays relatively flat.
- Position smaller codes on the outer bicep area of a short sleeve for a clean, modern accent.
- Print codes on inside neck labels to share garment care instructions, supply chain transparency, or authenticity certificates.
- Avoid side seams, ribbing, collars, pocket edges, and lower hemlines that bunch up or stretch during movement.
Verifying Scannability Before Full Production
Never run a full production batch without conducting real-world hardware tests. A digital design that renders clearly on an illuminated monitor can fail once pressed onto textured cotton. Learn how to test a QR code before printing to catch sizing, resolution, or contrast defects early.
Press a single sample transfer onto scrap fabric matching your production garments. Use both an iOS and an Android smartphone to check detection speeds, or verify the layout using a web-based סורק QR אונליין in both bright daylight and low indoor light. Test the shirt while a person is wearing it – raising their arms, turning, and standing naturally. If the phone struggles to lock onto the finder patterns when the material flexes, increase the overall print size or switch to dynamic links to reduce pattern density.
שאלות נפוצות
A QR code on apparel should measure at least 2×2 inches (5×5 cm). Fabric wrinkles, body curvature, and movement make smaller codes difficult for mobile cameras to scan reliably.
Yes, provided the transfer uses a solid white underbase that prevents the shirt fabric from bleeding through the design. Scanners require sharp contrast between the modules and background, so test the print under varied lighting before production.
Allow the transfer to cure for at least 24 to 48 hours before the first wash cycle. To preserve the sharp edges of the modules, wash the shirt inside out in cold water and hang dry or tumble dry on low heat.